Types of Garlic
Garlic comes in different sizes, colors, shapes, flavors, and clove types. Along with the two subspecies of garlic, there are about ten major variety groups, as well as over 600 cultivars (all of which are believed to have originated with the original major ten). Let’s take a look at the difference between the hard and soft-neck garlics, as well as the key points of the major ten and some of the various types within them. Keep in mind that, although there are a vast number of varieties of garlic, it is all used in the same way, with the only difference being how mild or spicy a bulb you are wanting to use.
GROWING AND COMPANION PLANTING
garlic is fun to tend and, after learning the basics, is not that difficult to grow. If you’re considering gardening, but aren’t ready to commit to a larger-scale vegetable garden, garlic could be the perfect starting point for you. Garlic serves as a good starter for someone contemplating a vegetable garden, but who only wants to plant one or two things. Garlic is a relatively low-maintenance plant, as there is not much to do after planting. However, as a result, garlic tends not to give a new gardener the true, “regular” gardening experience. This is due primarily to garlic having an easier planting and harvesting schedule, which doesn’t coincide with most other planting (depending on where you live). For this reason, garlic serves best as an add-on, perhaps with tomatoes and basil, as opposed to being planted solo. But, when it comes time to expand into a larger garden setup, don’t leave garlic behind! Like so many other plants, garlic can also act as a companion plant in the garden, aiding and enhancing the growth of certain nearby plants. As companion planting needs to be taken into consideration as the garden is being planned and before its planted let’s take a look at companion planting first.
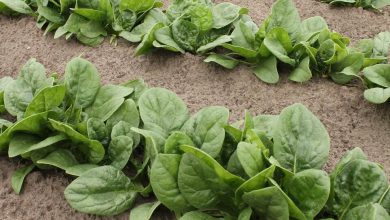
related article: how to grow spinach
Why Use Companion Planting?
The big question you might be asking is: what exactly are the benefits of companion planting? Companion planting can protect some plants from pests and disease, or help other plants grow while also encouraging beneficial insects, all through the use of other plants. It is a chemical- free way to maintain the garden while still gaining much of the benefit of modern pesticides and fertilizers. Garlic not only makes a good companion plant, but can itself benefit from having some plants to assist it, as well.
What makes garlic such a good “companion?” Simply put, garlic accumulates sulfur, a natural fungicide, which provides protection from disease. And, even as the planting of garlic will help deter pests and even disease, it will encourage beneficial insects as well. Let’s now take a look at what are some good companions to garlic:
- Tomatoes
- Potatoes
- Sweet peppers
- Eggplant
- Spinach
- Broccoli
- Cauliflower
- Kale
- Carrots Most fruit trees and strawberries
related article: How to Grow Tomatoes, Peppers, and Eggplant
When used with vegetables, garlic can repel aphids, cabbage worms, cabbage loopers, cabbage maggots, and slugs. Garlic repels the red spider mite on tomatoes, and is said to confuse carrot flies when planted with carrots, as well as helping to protect from root maggots. It is also of note that rabbits will stay away from gardens where garlic is planted.
Tips for Companion Planting with Garlic
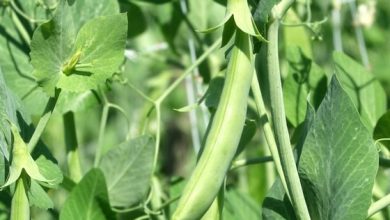
But despite the many “companions” that garlic works well with, there are also some plants that it doesn’t behave quite as well with, and should not be planted anywhere near. For example, when planted near beans or peas, garlic can affect both growth and taste. As a result, these two items should never be planted next to the garlic.
When laying out garlic for use in companion planting, it is best to do so by scattering the garlic throughout, rather than keeping it in its own patch. The benefits of companion planting depend on the companion plants being in close proximity to each other. If it is not planted near other plants, then it can neither sow nor reap the benefits of companion planting. Rather, the garlic should be scattered throughout the garden, up to and including planting between other plants. In addition to letting garlic do its job, it also helps by reducing garlic’s risk of onion-maggot infestations.
Alternate Methods of Companion Planting
Although companion planting isn’t foolproof, it can make a real difference in the garden, especially if you are going for a completely pesticide-free garden. We have already discussed garlic itself, as a plant, and what it repels. There are actually other ways to implement garlic as a “companion” to other plants. Garlic oil, for example, will deter such pests as onion flies, aphids, and ermine moths, while garlic tea (or spray) can help against potato blight, as well as tomato blight.
Planting Garlic
Now that the companions are set, and you’ve had a chance to plan out your garden’s layout, let’s take a look at planting and growing the garlic itself.
When deciding on which garlic varieties to plant, it is worthwhile to keep in mind a few of the differences between hard and soft-neck garlic (besides the hard and soft necks, obviously). The hard-neck varieties will usually have more color and be larger, but tend to have fewer cloves making up the bulb. Consider where you will be doing your planting; when planting in southern climates, some varieties don’t do well, while other varieties do well, depending on where you are in the south.
Soft necks, on the other hand, will have more cloves, and tend to do much better in warmer southern climates. For the best results, try using a variety of garlic types in the garden. Make note of what does and doesn’t work for you and your garden, and weed out the varieties that aren’t well suited to your area. If you don’t feel like experimenting, you can always research the specific types that are known to do well in your area, and prioritize their planting.
Garlic should be planted in the fall, in loose, well-drained soil of 6.0 to 7.0 pH. pH, remember, is not a measurement of soil’s fertility, but is rather a measurement of the soil’s acidity or alkalinity.
If the measurement is off, in one direction or another, it can be adjusted to fit the particular plant’s needs. Home test kits and pH meters can be purchased from gardening and home supply shops, while soil samples can be sent to labs for testing. In looking for sufficiently loose soil, remember that garlic prefers a sandy loam, but will still do pretty well in most any soil. The primary need is good drainage, a requirement which cannot be stressed enough; if drainage is poor, the garlic will be too wet and will rot as a result.
To prepare a plot for planting, turn or till the soil, removing rocks and other obstructions while making the soil as loose as possible. Remember that the looser the soil, the larger the bulbs will be able to grow. Then, add compost with an animal manure/plant matter composition.
As garlic is planted in the fall, the timing of planting is key, particularly in colder areas. Make sure to plant after the first, heavier frost, but at least 6 weeks (if possible) before the first hard or “killing” frost. This will allow the garlic time to establish strong roots before the ground begins its winter ritual for heaving through the freezes and thaws, which will enable the garlic to “hang on” through the movements. Be that as it may, garlic doesn’t really like all the heaving that comes from the freeze and thaw cycles, nor does it do particularly well in extreme heat. Therefore, garlic planted in warmer climates will benefit from mulching.
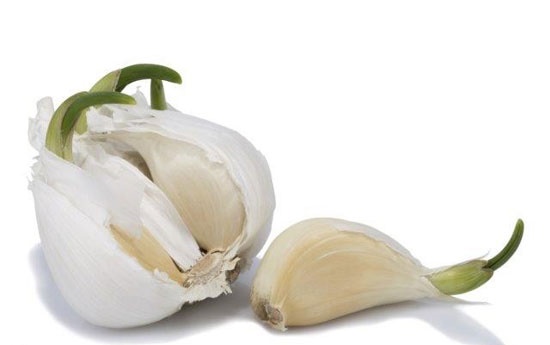
Planting with Cloves
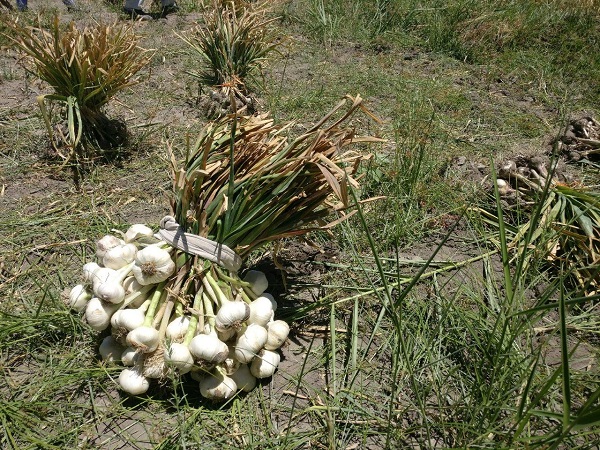
When planting garlic, typically one starts with garlic cloves rather than garlic seeds (although seed can be used). And, although the garlic is basically cloning itself when planted from cloves, this method allows for faster growth than with seed. When selecting the garlic bulbs that will provide the cloves for planting, look for a nice shape to the bulb, and cloves that are fat. Although selecting bulbs with both qualities is ideal,
if you can choose only one, select for clove size over bulb shape, as this will usually give you an idea of the size of the resulting bulb. That is, if the cloves are small, you will end up with small bulbs. But don’t throw those small cloves away; use them for cooking instead!
To remove the cloves from the bulb, remove the paper or wrapping on the bulb (but not on the cloves), and break apart or “crack” (as it is called) the bulb down into cloves. The breaks should be clean, and the cloves should be intact. If cloves are broken during “cracking,” keep for culinary uses; they are no longer suitable for planting. Do not allow the cloves to dry out either; if you are not planning to plant that same day, the cloves should be planted within a few days (at most) of cracking the bulb. If you notice that some of the garlic has begun to sprout before you crack it, it is still fine for planting.
But if the bulbs feel light and dried out, throw them away. As a side note, if you are using cloves from garlic that you had originally purchased to cook with, make sure that you liked the flavor—the resulting new bulbs will taste like the garlic that you planted.
When planting a clove, plant with the root (flat) end down, in single or double rows. If planting in beds, or if you’re planning on utilizing companion plants, make sure to scatter the garlic throughout (being careful as to who the “neighbors” are). Ideally, the rows themselves should be 18 inches apart, with the cloves planted 4 to 6 inches apart. If need be, you may plant a bit tighter, but the end result will be smaller bulbs. Cloves should be planted 2 to 4 inches down, with the deeper number being used for northern climates with colder topsoil temperatures. In areas that get killing frosts, some choose to plant even deeper, but not much beyond 71⁄2 inches.
Mulching
Once the cloves are planted, it is a good idea to spread mulch over the planting site; note that this is pretty much a necessity in colder climates. The best mulch to use is straw; however, leaves will also work. Wood- chip mulch should not be used, and while hay can be used in a pinch, you will have a lot of weeding to do when the hayseeds shake off and begin to grow with the garlic.
When mulching, simply lay the straw or leaves over the entire garlic plot, up to 8 inches deep. Remember: the colder the climate, the deeper the mulch. This mulch layer will remain over the newly planted garlic for the entire winter. One drawback to mulch, however, is that it can encourage rodents to nest; this is especially the case with straw, which provides a warm bedding. But again, especially in cold climates, the benefits of mulch outweigh the risks; although you as the gardener have the final decision, mulching is a highly recommended step, best not to be ignored. If the garlic is scattered, do the best that you can; just cover the spots where you planted.
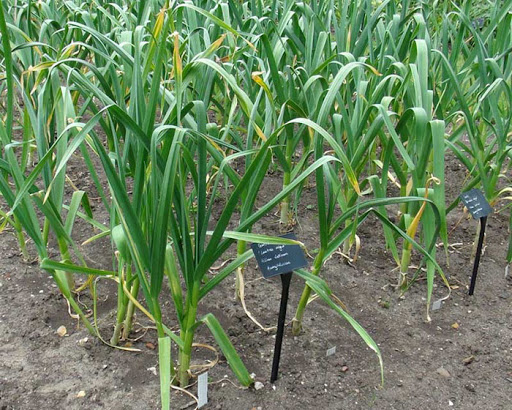
Finally, and this goes for all gardening, don’t forget to label your patch, bed, or wherever the garlic was planted. If you planted different varieties, list the variety on the marker as well.
The garlic should remain under the mulch for the entire winter, with no watering. In the spring, after the threat of frost is over, remove the mulch. At this time, you can also give the garlic some composted manure or fertilizer, and then water well. After this initial watering, water again only when dry, as over-watering will cause bulbs with poor storage capabilities, poor wrappers, and broken skins, and may encourage mold to grow. Caution is a must when watering the garlic patch.
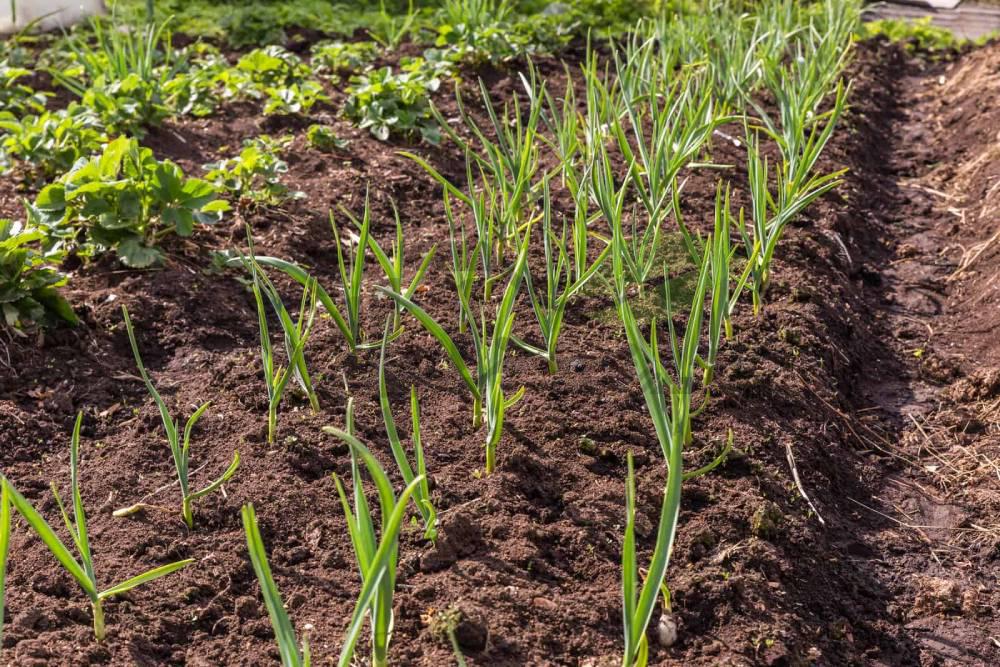
Once the mulch is off and the garlic is beginning to grow, weeding is essential. Garlic does not like to compete with weeds, and tiny garlic shoots can easily be choked out by the weeds. Therefore, to ensure a healthy garlic take, make certain to keep the weeds in check. Then, 2 to 3 weeks before harvest time, let the soil dry out. This will help prevent mold.
If you have planted hard-neck varieties, it is recommended that you remove the scape (with the notable exception of the Turban varieties; they seem to do better with their scapes left on). The removal will prevent the flower from going to seed, which in turn reduces the size of the finished bulbs. Don’t throw the scapes away, though; they may be cooked and eaten!
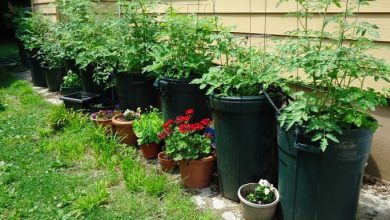
Growing Garlic Indoors
Although garlic may be grown outdoors in containers quite easily, indoor growing can be quite a different story. Although it is not a total impossibility, planting a clove and having it develop into a full bulb is quite difficult to accomplish indoors. You will need to replicate the stages that the garlic would go through naturally as it grows outdoors, including its cold, dormant period. It can be fun to try, and you might even be successful, but you have a better chance of failure than you would success.
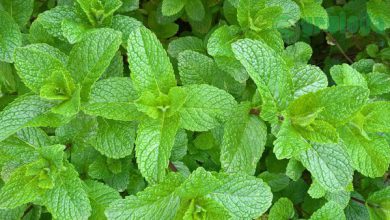
However, when planting garlic indoors, success will yield some very nice greens, and it is for these greens that gardeners choose to raise garlic in indoor containers during the winter. The greens are easy to harvest (snip them just as you would chives) and may be used like chives, only with a wonderful garlic flavor that will be appreciated during the winter months, after the last of the homegrown garlic is gone.
Garlic greens are easy to grow; simply plant garlic cloves in your chosen pot, with the number of cloves selected depending on the size of your pot. Keep in mind that you are growing strictly for greens, and not bulbs, so the cloves may be planted closer together than you normally would in a garden. Use a lightweight soil in the pots, as this will allow for drainage that will prevent the cloves from rotting, and make it easier to handle the pot itself. Set in a sunny area and water as needed. It’’s relatively low maintenance, and makes a great winter project for the kids.
Planting Garlic from Seed
The easiest (and most popular way) to plant garlic is through the
planting of cloves, as we have just discussed. However, garlic may also be planted from seed or top sets.
Starting garlic from seed can be a longer process, and is not always a good way for beginners to start; however, it is far from impossible. Usually, the most difficult point in seed planting is the first generation of seed, as in just starting out. Planting from seed will get easier with each generation that follows.
Growing garlic from cloves or bulbils is actually an example of “asexual” reproduction, as it technically creates a clone of the parent plant. While growing using this method is easier and faster, this method may eventually pass along disease and cause problems with genetic diversity if done for too long (planting clones from clones from clones can cause a general degradation of the crop).
Using seeds when planting garlic allows for greater variation in your possible harvest, as growing from seeds allows garlic to go through “sexual” reproduction. Although planting seeds is typically more work, especially if you are planning on harvesting the seeds yourself, it will produce a healthier plant and greatly reduce the risk of diseases that can be passed on through “asexual” reproduction.
Growing Seed Garlic
When growing garlic to produce seed, select a hard-neck variety instead of a soft-neck. Soft necks cannot produce flowers, and therefore cannot produce seeds. The garlic seed itself is a little larger than an onion seed, which is itself quite small.
Unless you are purchasing garlic seed, there are two necessary steps to consider when growing garlic plants from seed: producing the seed (which is the step eliminated by purchasing seed from elsewhere) and growing the seed into the plant itself, which you will later harvest (and gain more seed from).
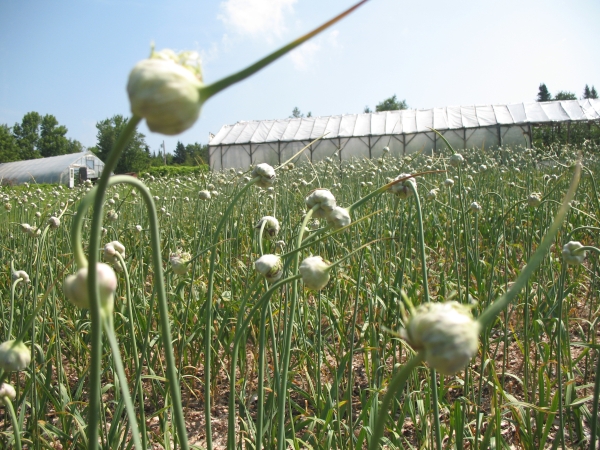
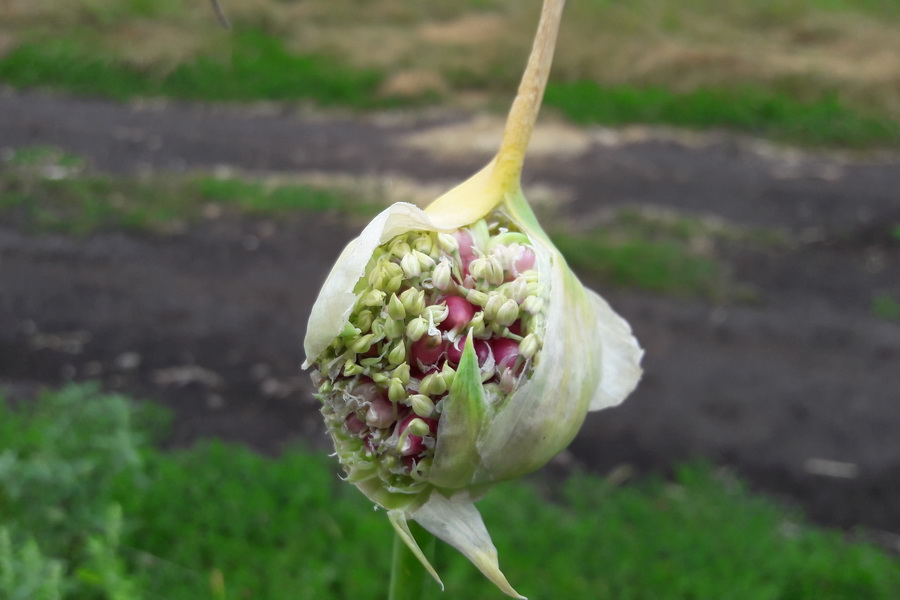
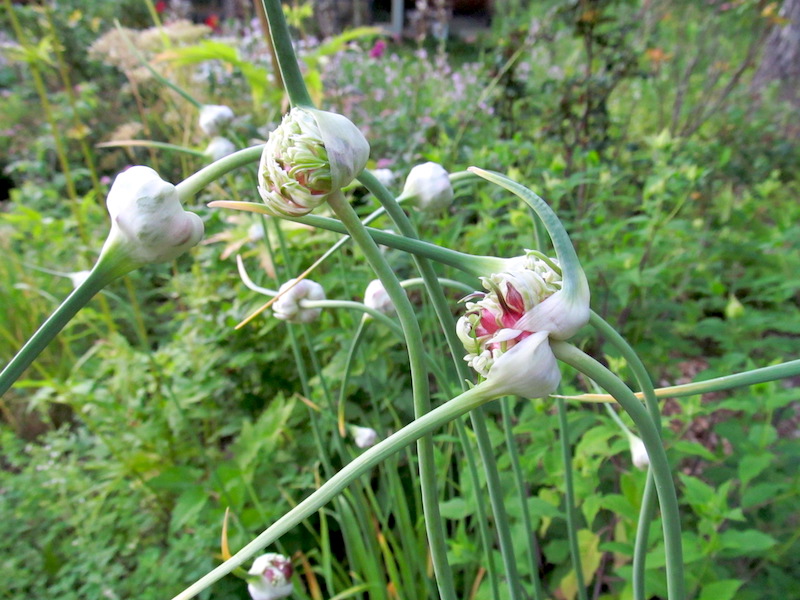
As the garlic plant matures, the scape emerges and the umbel develops. The umbel is a group of tightly packed flowers and bulbils, which are found in the spathe or the leafy covering. To expose the flowers and bulbils, you can either gently slit open the spathe, or else allow it to dry naturally. At this point, the scape may be cut from the garlic and kept in water (like a flower) or else left on the garlic.
You should, of course, use whichever way works the best for you, but there are a few things to consider when leaving the scape on the garlic. As the scape is heat sensitive, too much heat can wilt the flowers and reduce the viable pollen count. And, being cold sensitive, temperatures that are too cold can prevent the seed from setting. Both of these issues can be dealt with through the use of shade cloths or portable hoops over the garlic. However, there is also weather damage and pests to consider, and those with smaller garlic crops may want to seriously consider storing them in water, inside. Either way, the survival of the scape is essential to successful seed harvesting.
Should you choose to remove the scapes (as many will do) and keep them in water, it is a good idea to add some liquid fertilizer as well. You may also find that the base of the stalk turns dry, or becomes slimy and turns brown. As it is essential that the healthy stem be in contact with the water, simply trim the undesired end off and return the rest to the water.
Once it is developed, the bulbis will need to be removed, as it will begin to compete with the flowers (which are necessary to produce seed). This will be further discussed in the following section of this chapter. The garlic flowers themselves are protandrous, meaning that the flowers cannot fertilize themselves. The job of pollination needs to be done by insect pollinators, such as bees (or any other available pollinator).
The ovaries of the garlic flower are located at the base of each little flower. Each ovary has three chambers and each chamber has two ovules, resulting in each flower being able to produce as many as six viable seeds. As the seeds develop, the ovaries will swell (usually 40 to 60 days after pollination).
The seeds will be ready to harvest when the umbels and ovaries are completely dry. The easiest way to harvest garlic seeds is to remove the dried flower heads from their stems, place them in a bag, and gently shake it to release the seeds. If the collected seeds are thoroughly dry, they may be stored in an envelope or seed envelope.
Note that garlic seeds should not be planted immediately, as they need a period of dormant time between harvest and planting. Spending a bit of time in the refrigerator will mimic the natural cold exposure necessary. To help protect the seeds from contamination, soak them for 20 minutes in a mixture of 1 teaspoon of bleach to 2 cups of water. Rinse well, place on a moist paper towel, and then place in a plastic bag. Refrigerate for approximately 4 weeks.
Planting Bulbils
The bulbils is the third option available when growing garlic. It, like the clove, produces a clone of the parent. There are pros and cons to starting off with this part of the garlic. Some of the advantages include the fact that there are more bulbils than cloves, so you have a larger starting crop, and can eventually have a larger harvest. Using bulbils can also help to avoid soil-born diseases in the resulting garlic, as they do not touch the soil until planted. The main disadvantage is that, like seeds, it can take a few years to get full-size bulbs from bulbils. You will need to harvest and replant until the full bulb is obtained. The final decision is up to the gardener, however, as all three methods are viable solutions for garlic production.
Bulbils can be found located with the flowers, and look a bit like little cloves. As stated earlier, if you are trying to produce seeds, the bulbils needs to be removed as soon as it is ready, as they compete with the flowers for nutrients, and can cause the flowers to die before they have a chance to produce seeds. Again, you may cut the scapes off or leave them on the garlic. If you cut them off, follow the same procedure of keeping in water. Removing the bulbils allows the flowers to fully develop, thereby allowing the flowers to produce seeds.
Removal of bulbils is done with tweezers, and can be time consuming, but it is not a difficult task. Bulbils can be tiny, tightly packed, and hard to detach from the flower area. Other varieties of garlic have larger bulbils, which are fewer in number and loosely packed. Regardless, they can be carefully plucked out (using tweezers as the removal tool of choice). However, note that all of the bulbils may not be ready to dislodge at the same time. If this happens, just let the flower head sit for a few days and try again. Check back daily for a few weeks, as all bulbils may not form at the same time. Remove as necessary. If you are not going to save the seeds, there is an easier way, especially if the scape has been cut off: simply hang it up to dry long enough so removing the bulbils will be easier.
Keep in mind that bulbils have a naturally high moisture content. If they are not dried properly, then no matter how they were harvested, they can still mold. Once dry, the bulbils should be stored at room temperature, not in the refrigerator. Bulbils should be planted in the fall, when you would normally plant garlic cloves (although some do plant as early as possible in the spring). Prep soil like any other planting.
Planting space for small bulbils is as follows:
- 1⁄2 to 1 inches apart
- 11⁄4 to 11⁄2 inches deep
- 4 to 6 inches between rows
Planting space for large bulbils is as follows:
- 3 inches apart
- 11⁄2 to 2 inches deep
- 6 to 12 inches between rows
If slight adjustments need to be made for your space, go ahead and experiment. For areas with hard frosts, plant bulbils deeper so freezing doesn’t kill them.
The first year’s harvest can be done right along with any other garlic that you are harvesting. This first year’s growth is called a “round,” and looks like a green onion. Cure and replant in the fall. By the second year, the bulb should be developing. However, it will most likely be smaller than a bulb from a clove. Harvest and replant in the fall.
By the third year, the garlic bulb should be the correct size and well adapted. With multiple choices available to gardeners to produce garlic in the garden, whichever method you choose will produce good, homegrown garlic.