Introduction
Beans, peas, and other edible legumes are important foods for people all around the world, providing an affordable, abundant, and nutritionally dense source of protein. Dry beans and peas can be stored for many months past the harvest and cooked into a delicious and filling main dish, earning them the nickname “vegetarian meat”. Green Beans, Snow Peas, and Sugar Snap Peas, the immature pods of the bean and pea plants, can be eaten raw or cooked as tasty and nutritious green vegetables.
Beans and Peas to Fit Your Climate: What’s Best for Your Region
Most temperate, subtropical, and tropical climates are capable of growing beans, peas, or related legumes for food. Here are some suggestions for what to plant in particular types of climates. Following these lists, there is a brief definition of each type of bean or legume.
related article: how to grow Peas
Moderate, Temperate Climates
- Common Beans Runner Beans Chickpeas (Garbanzos) Lentils
- Fava Beans
- Peas
- Hot, Humid Climates
- Lima Beans (Butterbeans)
- Soy Beans, Azuki Beans, and Mung Beans
- Yardlong Beans, Winged Beans, and Hyacinth Beans Cowpeas (including Black-Eyed Peas)
- Pigeon Peas
- Common Beans
Hot, Dry Climates
- Tepary Beans
- Common Beans
- Yardlong Beans
- Pigeon Peas
Cool or Short Season Climates Peas
- Peas
- Favas
- Runner Beans
- Common Beans
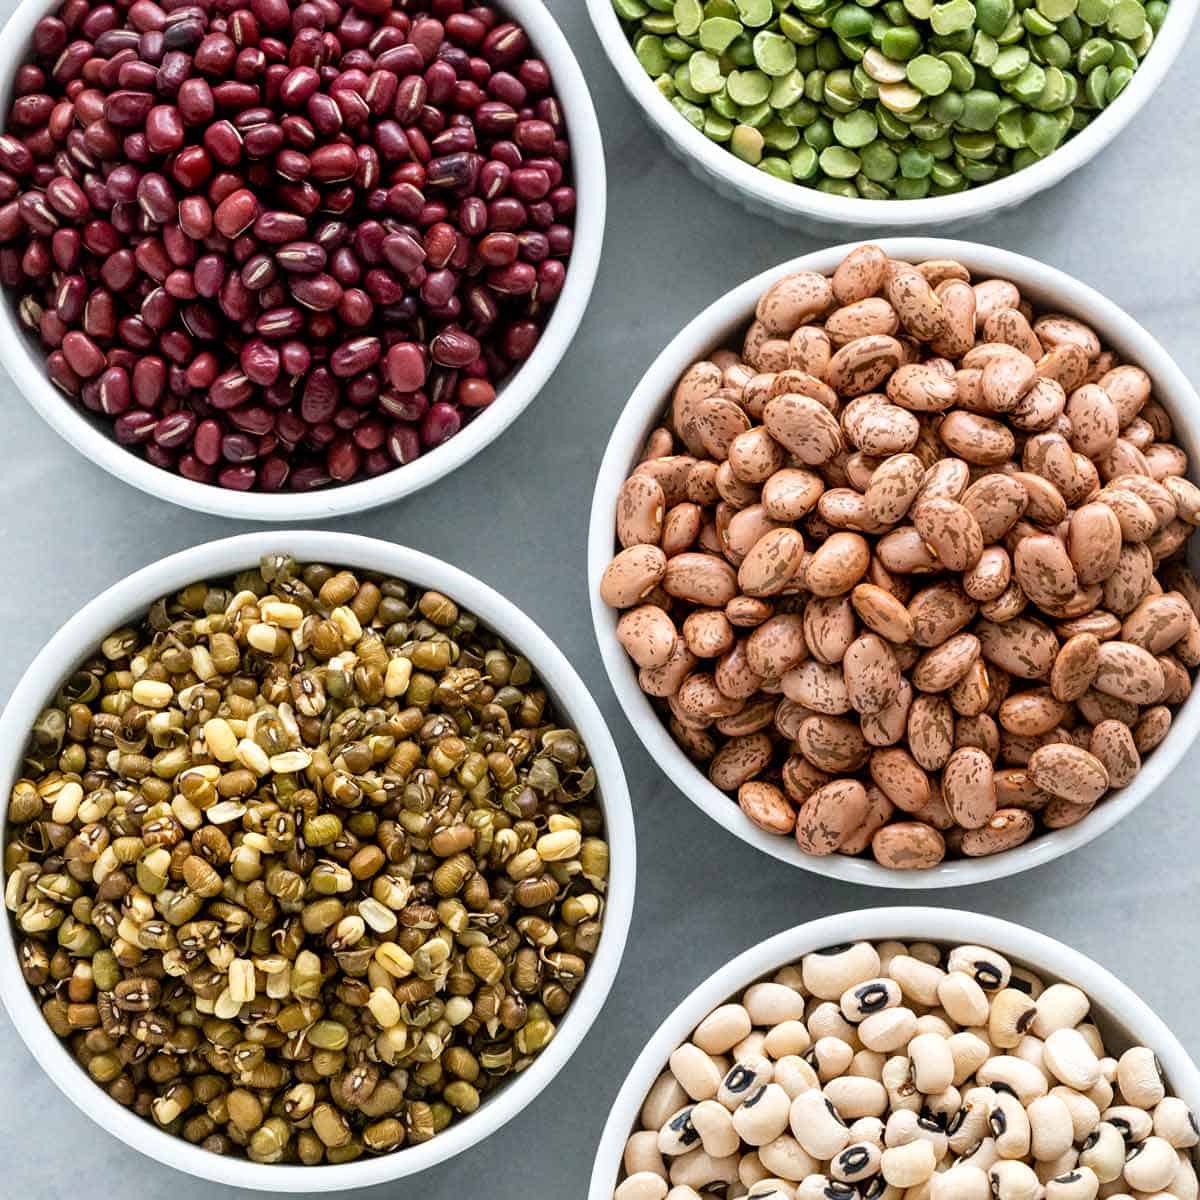
Bean Types Defined (Common Varieties of Edible Pulses or Legumes)
Azuki Beans (Adzuki Beans): Small, red bean native to East Asia. These are high in protein and fiber. They are used widely in Chinese, Japanese, and Korean cooking. In all three countries, the beans are often mashed and sweetened for use in desserts, such as sweet rice cakes and bread rolls. Like soy and Mung Beans, azukis grow best in warm and humid conditions.
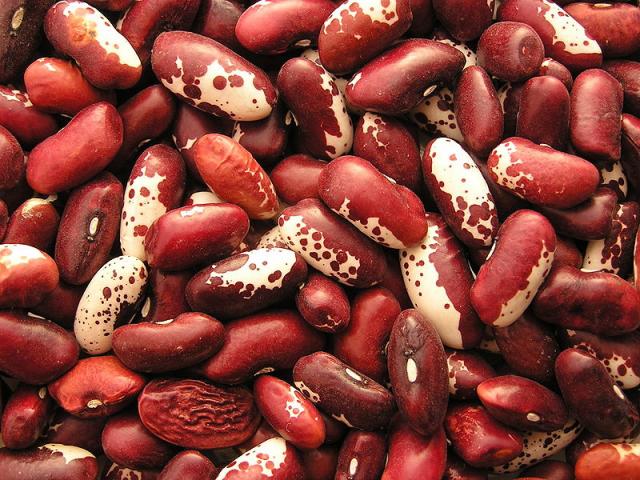
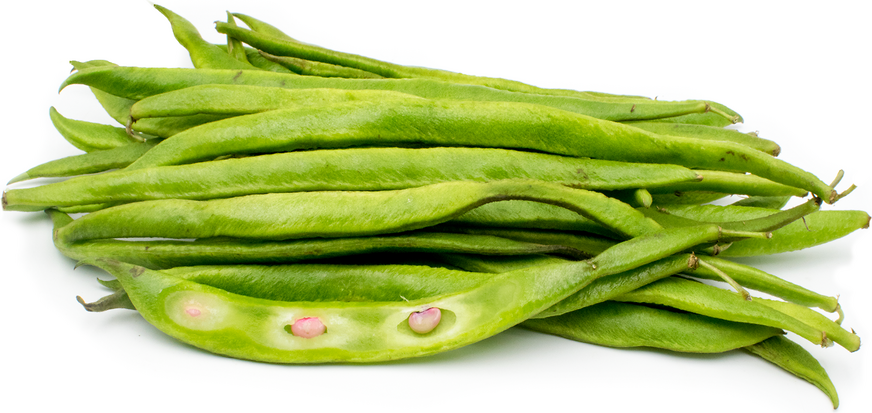
Common Beans: These are the beans that most of us know and love. Most dry beans and green (snap) beans consumed in North America and Europe fall into this category. Kidney Beans, Black Beans, Navy Beans, and Pinto Beans are a few examples. Green beans, yellow wax beans, and French filet beans are the immature pods of various common beans. Common beans will grow in most climates during the warm summer months.
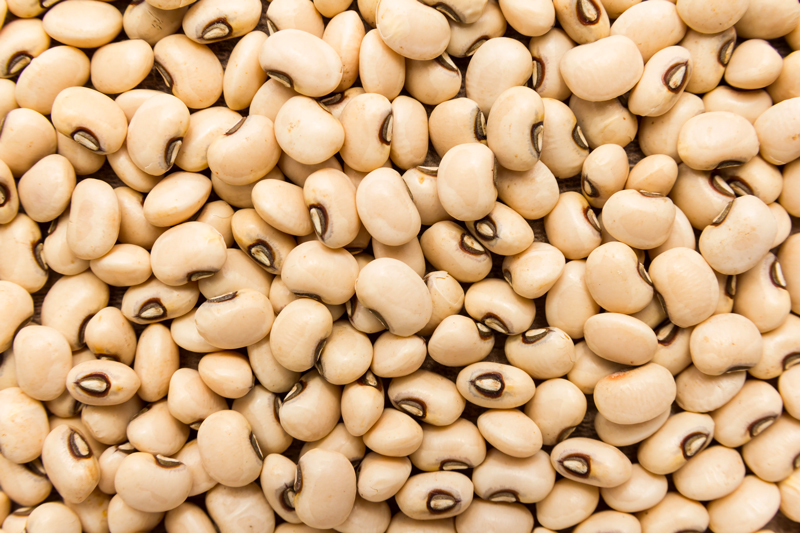
Cowpeas: Native to Africa, Cowpeas are widely used in the southern United States. Black-Eyed Peas, Crowder Peas, and Southern Peas all fall into this category or are used as synonyms for Cowpeas. These beans thrive in hot, humid growing conditions. If you live in a cooler climate and want to grow Cowpeas, try a shorter-season variety called California Black-Eyed Peas. The picture below shows a salad made with cooked Black-Eyed Peas.
Fava Beans (Broad Beans): Favas are a great cool season crop that can be started earlier in the spring than other beans. In many climates, you also can get a fall crop from a late summer sowing. Favas are a popular cover crop in the cooler seasons as well, providing livestock forage, fixing nitrogen, and increasing the organic matter content wherever they are grown. Slightly less than one percent of the human population has an allergy to the proteins in Fava Beans, so if you notice any trouble eating them, please stop doing so. For everyone else, these are a good off-season option for bean protein. I like to boil, skin, and puree favas to make a hummus-type dip; try adding some olive oil, a little pressed garlic, and sea salt…yummy!
related article: how to grow garlic

Lima Beans (Butterbeans): Limas are subtropical beans that grow well in hot weather. They are quite popular in Central America and the Southern United States. While they will grow in other regions as well (such as warmer parts of the U.S. Midwest), Lima Beans are not as adaptable as Soybeans. The pods can be picked fresh for shelling or allowed to dry so that beans can be stored.

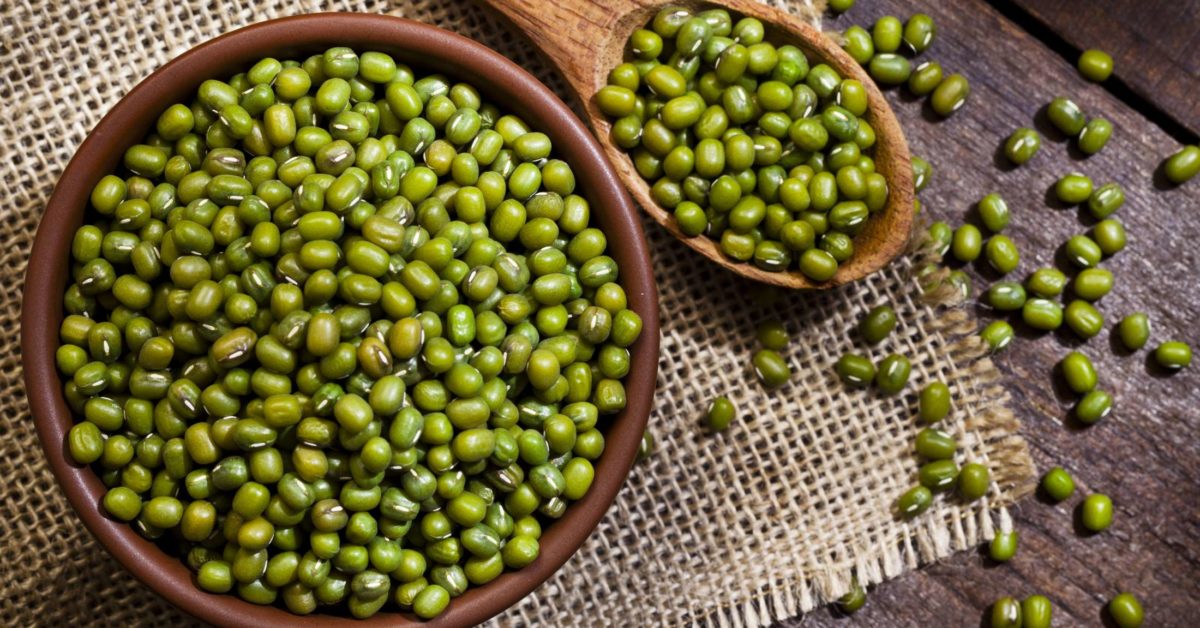
Mung Beans: Mung Beans are best known for their sprouts, which are a staple of Chinese, Thai, and other Asian stir-fry and noodle dishes. The small green bean seeds also are edible, serving as an important protein source in India, China, and elsewhere. Mung Beans grow best in warm, humid conditions, having similar requirements to Soybeans. They require a long season of 90-100 days from planting to harvest.
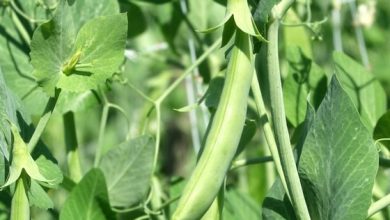
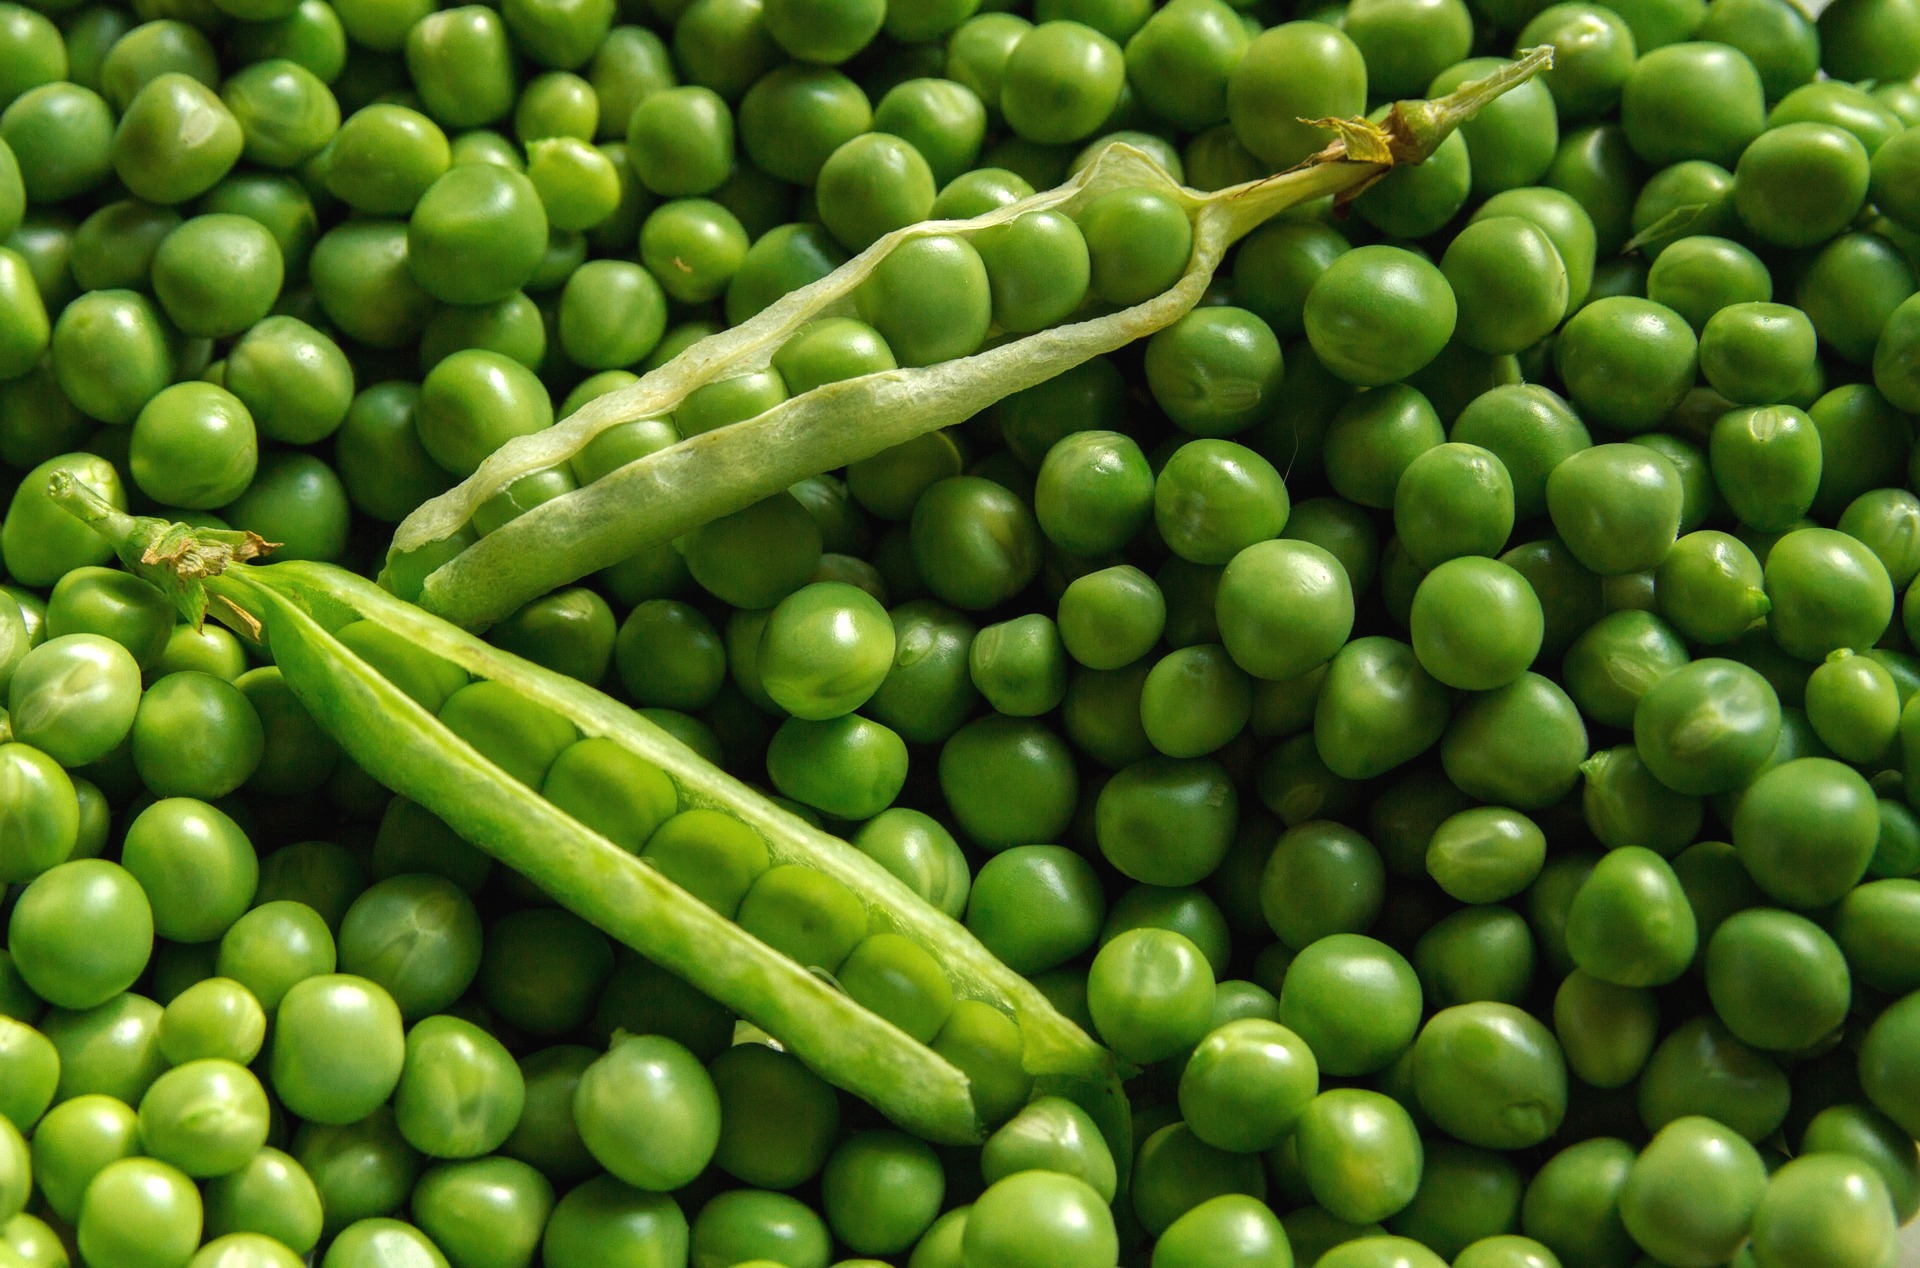
Peas: Peas can provide a cool-season source of vegetables and seed protein. In most climates, you can grow peas in the springtime and often get a second crop in the fall. Wild peas are native to the Eastern Mediterranean, and archaeological evidence indicates they probably were domesticated in this region that includes Turkey, Syria, and Jordan. Peas are grown for their delicious young pea pods (Sugar Snap Peas, Snow Peas) or allowed to mature for shelling or dry peas. Sprouted peas and young pea shoots are enjoyable as well. Because peas are important enough in modern cuisine and can be grown in cool weather before other beans can succeed.
Pigeon Peas: These legumes are popular in India, other parts of South Asia, and East Africa. They have a smaller following in the southern United States as well. The cooked beans have a slightly sweet, mealy taste and make good soups. They can grow well in hot, humid weather, but also are fairly drought-resistant.
Runner Beans: There is nothing as beautiful as an ugly fence covered with Scarlet Runner Bean foliage and its cardinal red flowers. Like peas and favas, Runner Beans can be planted slightly earlier than common beans (though they are not quite as hardy as peas or favas). Harvested early at the green bean stage, the large pods of varieties like Scarlet Emperor are tender and delicious. Even though they’re a bit fuzzy, they taste much better than they look. If you wait to harvest runners for shell beans or dry beans, get ready for a “Jack and the Beanstalk” moment. These magic bean seeds can grow as large as small eggs and are beautifully colored in pinks and purples. They also taste really good when cooked. Here is a picture of Scarlet Runner Beans flowering.
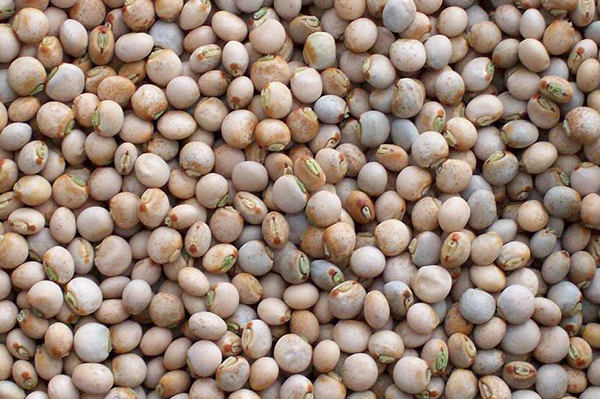
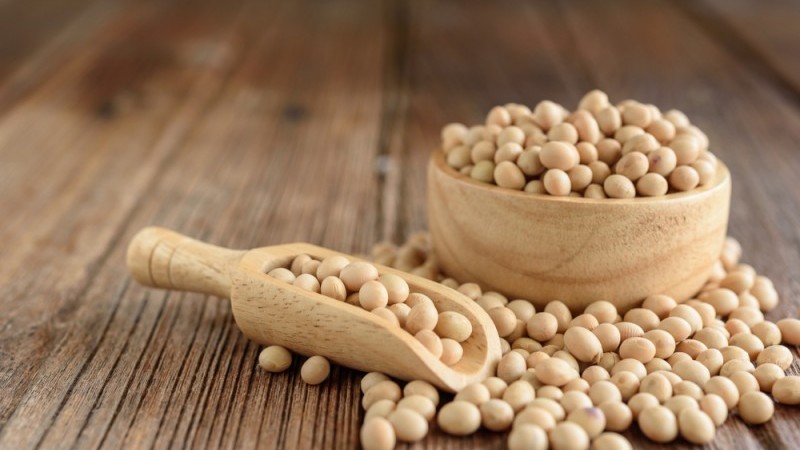
Soybeans: Soybeans may well be the most widely grown plant on this list. The beans are grown for eating, for their oil, and as a livestock food source. On a smaller scale, many home gardeners have become interested in growing soybean varieties that produce tasty green Soybeans, called Edamame in Japan. For Edamame, the pods are picked green and steamed or boiled in salt water, then they are shelled and eaten for a delicious snack. Soybeans need warm summer weather and perform well in humid conditions.
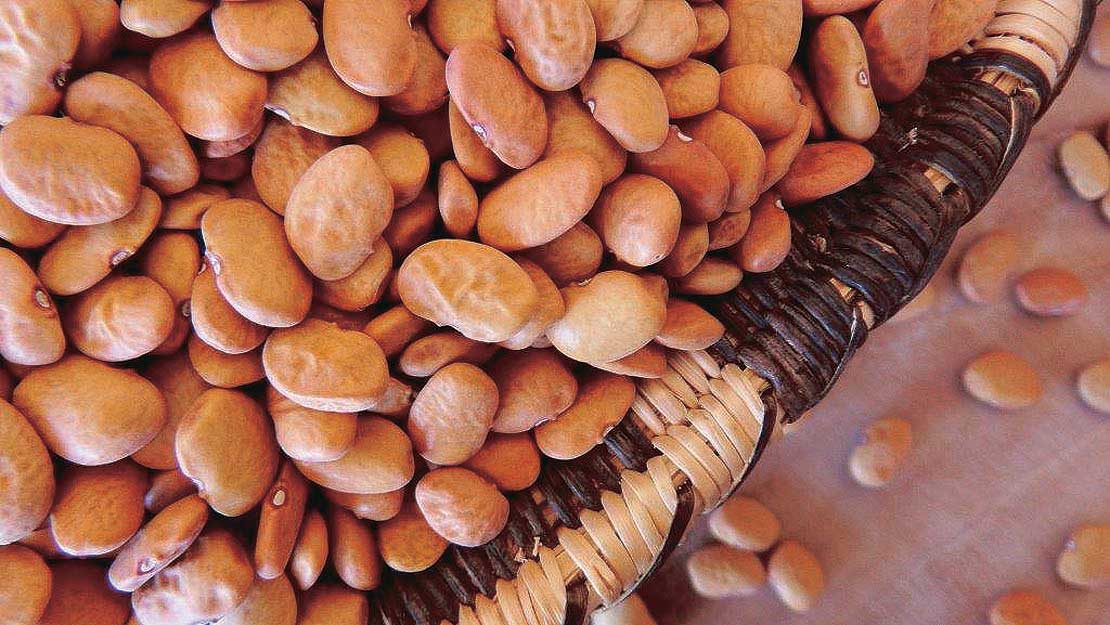
Tepary Beans: Tepary Beans are the best choice for dry, hot, desert climates. They were grown by the Native Americans in the U.S. Southwest. The small brown, black, white, or yellow beans taste like pinto or Navy Beans when cooked. High in protein and fiber, they are the most drought resistant bean on this list.
Yardlong Beans, Winged Beans, and Hyacinth Beans: These are some tropical plants grown in Southeast Asia. These are used mainly for green beans as vegetables. All of three of their names are descriptively accurate. Yardlong Beans (a.k.a. Asparagus Beans or Noodle Beans) are in the cowpea family. They hang from plants like long ropes and taste much like other kinds of green beans.
They are cut into manageable sections and often appear in Thai cuisine in the United States. Hyacinth Beans have beautiful magenta purple pods which are ornamental in the garden; Thomas Jefferson apparently grew them at Monticello. Some varieties may be toxic, but the pods and seeds are widely consumed in many tropical countries. Dry Hyacinth Beans must be boiled for long periods to remove the toxin. Winged Beans, which form large green bean pods with raised ridges, also have edible foliage and tuberous roots that are harvested for food (you can see a picture of them in the next chapter). Below is a picture of Yardlong Beans at a market.
Planting and Growing Beans
In the spring, as the soil warms, you can plant your first bean seeds. How will you know when the time is right? First, check this site to determine your last average (Spring) frost date for your location. For example, if you live in the area of Richmond, Virginia, this site gives you a last average frost date of April 27.
related article: How To Grow Healthy 17 Organic Vegetables The Easy Way
Second, just to be sure there won’t be any late frosts, add a week or two to this calendar date. For our example, that would suggest a planting date around May 4-11. Note that this is the earliest possible planting date; you could safely wait longer if you prefer. Third, check the weather forecast for your area using the Internet. Look at the extended forecast for the next 5-10 days. If the low temperatures are forecasted to remain much below 50 F degrees or if there is any cooling trend during that period, you may want to wait a little longer.
Bean seeds will sprout when the soil temperature is in the 60’s, but they germinate best in the 75-85 F degree range. Even if you plant bean seeds in cooler weather, they will wait and come up when they’re ready. What you want to avoid is temperature stress to the young plants, which might affect their growth and eventual productivity. Be careful of planting them when it’s warm enough for them sprout, followed by a period of colder weather or much cooler nighttime temperatures.
If there’s any doubt in your mind, wait an extra week or two to plant. Beans grow fast and probably will catch up anyway. One way to get earlier beans is to plant some bush beans first, and follow with your main crop of pole beans when you are sure the weather is warming. That way, if a handful of bush beans fail, it is no major loss, but if they grow well, then you will be able to harvest some beans a few weeks before the pole bean crop matures. A cold frame or a cheap season extender like a Wall O Water or Kozy Coat can insulate plants and buy you a little extra protection during cool spring weather.

For other types of legumes (aside from peas, which have their own chapter next), please follow the directions printed on your seed packet.
Bean Planting Specifications
- Days to maturity (Bush beans): 50-60 for green beans.
- Days to maturity (Pole beans): 70-80 days (green beans), 75-110 days (for shelling)
- Planting depth: 1-2 inches.
- Spacing for pole beans (rows): Space seeds 4-6 inches apart in row; rows spaced 36-42 inches apart.
- Spacing for pole beans (hills): Thin to 3-4 plants per hill; hills spaced 36 inches apart.
- Spacing for bush beans (rows): Space plants 2-4 inches apart in rows; rows spaced 24-30 inches apart.
- Minimum soil depth in containers: 6-7 inches (bush beans), 9-10 inches (pole beans).
- Temperature for seed germination: 60 F (min.), 87 F (max.), 75-85 F (ideal).
- Germination time: 7-10 days.
- Transplant seedlings at: 2-4 weeks. Better yet, just plant the seeds directly outside.
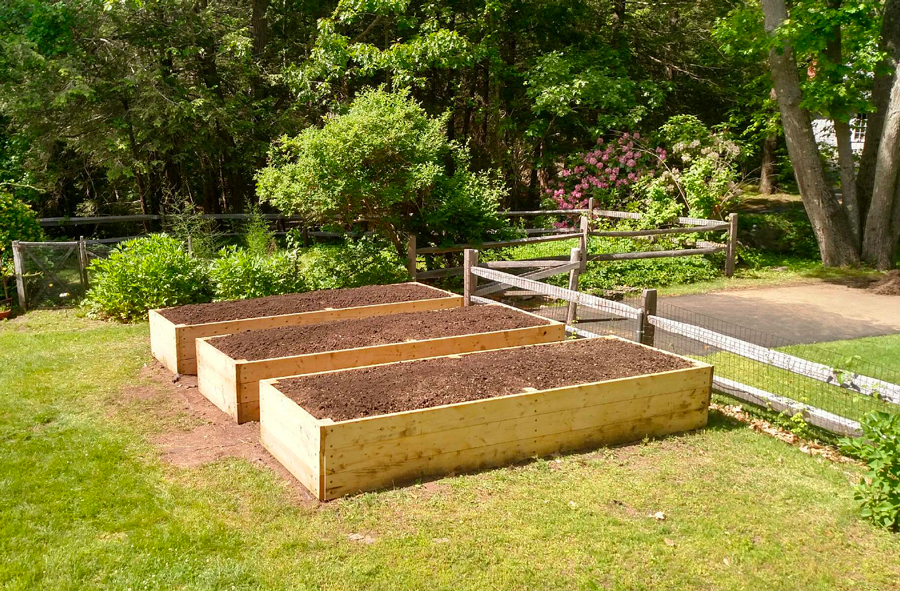
Growing in Containers, Garden Rows, and Raised Beds
You can grow beans in just about any kind of garden arrangement, including in a companion planting system such as the Three Sisters Garden. If you are growing pole beans, it is best to decide what kind of support you will provide them (see Chapter 10) and then plant your beans accordingly. Use the planting specifications above for row gardening.
For example, if you have a fence for them to climb, then planting in a straight row along the fence makes sense. If you plan to use poles or a trellis, you can plant beans around the base. In general, pole beans are a good candidate for growing in traditional long rows or in raised beds. You can grow them in larger containers also (try putting a few pole bean plants in a container at the base of a drainpipe or railing!).
Bush beans can be planted closer together and do not need additional support. This makes them a better fit for growing in containers and in raised beds of any size. For raised bed plantings, you can squeeze the rows a little tighter than in the specifications above. The soil in raised beds tends to be looser, deeper, and of better quality than the soil in ground-based rows, so plants can get by with tighter spacing in raised beds than in traditional rows.
Wherever you plant beans, the important thing is that you allow enough space for the plants to grow upward and still allow sunlight to penetrate and allow your hands to reach the right places for harvesting beans. You can even grow bush beans indoors. I grew some bush beans on a windowsill in some plastic soda bottles with the tops cut off, harvesting a handful or two of green beans from each plant.
Of course, you can grow beans in many other kinds of containers also: wood, ceramic, terra cotta, plastic, metal, fabric, and more. Make sure you use containers with a soil depth of at least 9-10 inches for pole beans or 6-7 inches for bush beans. Remember that beans like it warm, so if you live in a cool climate, a dark-colored container will retain a little extra heat on sunny days and keep the soil just slightly warmer than its surroundings. However, if you live in a really hot climate, then a light-colored container may be preferable.
While pole beans are a big commitment in terms of planning out the area and providing some vine support, you can plant bush beans as an afterthought. Do you have some extra spaces in your flower bed? A foot or two of unused space at the end of your garden? A patch of soil next to the sidewalk in front of your house? Pop in a handful of bush beans.
With their deep green, tropical-looking foliage, these plants look like they belong in any ornamental planting. I keep an extra bag of bush bean seeds and regularly scatter them in the garden every couple of weeks during the spring and summer. Remember that they fix nitrogen in the soil, which nearby plants will use, so planting bush beans around the garden is not only a selfish thing to do; it can help your other plants as well.
Stakes, Trellises, and Other Supports
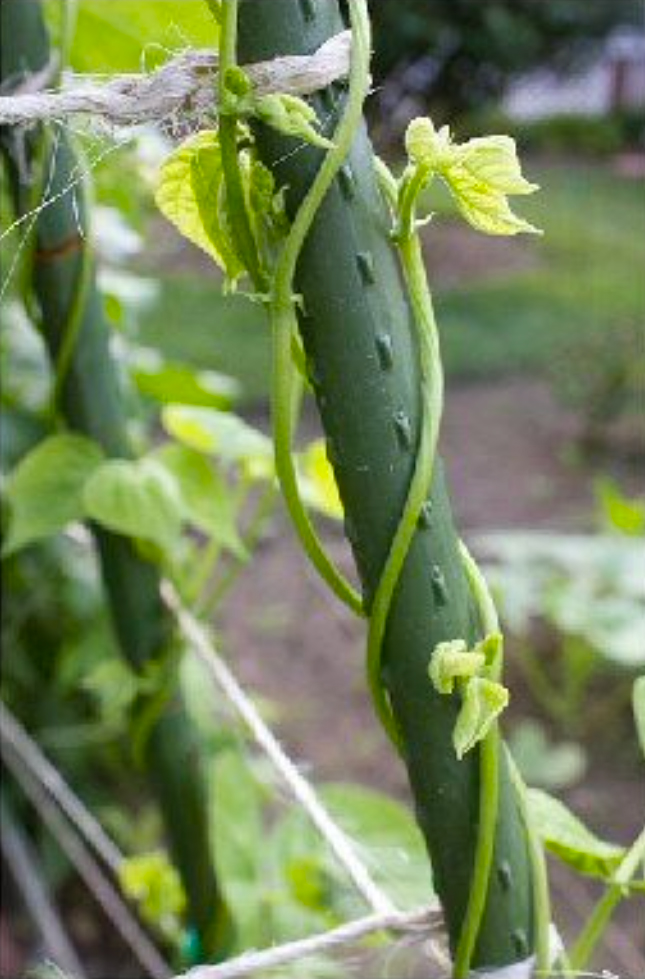
As you can tell from their name, pole beans need some support. They climb by vining their way around vertical supports, which can be made from stakes, posts, fencing, netting, twine, vegetable trellises or cages, or even naturally-present items like corn or sunflower stalks, small tree trunks, railings, or gutter downspouts. Here are some easy and affordable ways to trellis your beans.
Stakes and Poles
When you think of a pole for climbing beans, think more of a stake than a post. Any garden stake that is about 1-2 inches thick, such as those made from bamboo, redwood, and plastic, should do very well. The stakes should extend at least five feet above the ground, and remember that some pole beans can climb as high as seven or eight feet. Since stakes need to be pounded into the ground by about one foot to provide solid anchorage, you will want to find stakes that are one foot longer than the growing height you need. For example, a six-foot stake that is pounded a foot into the ground will give you five feet of height above ground, while a seven foot stake will provide six feet above ground.
related article:How to Grow Tomatoes, Peppers, and Eggplant
Many gardeners use reclaimed wood for stakes, such as sticks and branches they have gathered. This gives a rustic look to the garden, though pole beans will cover your supports from view. Since pole beans are so adaptable, there really are only three major mistakes you can make as far as stakes and poles.
The three mistakes to avoid are as follows. First, thick posts (like big wooden fence posts) are too thick for beans to climb. You do not want them to waste all their energy going around and around a thick post, since what they really need to do is climb upward towards the light. As mentioned above, 1-2 inches of thickness is perfect for bean stakes. Second, if you happen to try a vertical support that is completely smooth, such as a metal pole, it may be too smooth for beans to climb on. They need some roughage to cling onto, which is why even the manufactured stakes in the previous picture are made with little bumps on them. And third, pole bean plants are quite heavy as they bear their crop. Any stake that is thinner than an inch in width may not be able to support their weight.
Avoid these three mistakes and anything else should work fine. I have seen some truly crazy staking projects in peoples’ gardens. As long as their stakes are tall, rough, and relatively thin yet capable of holding the plants’ weight, they seem to be very effective for growing beans. You can also join together a number of stakes to make a larger structure that supports a greater number of bean plants at once.
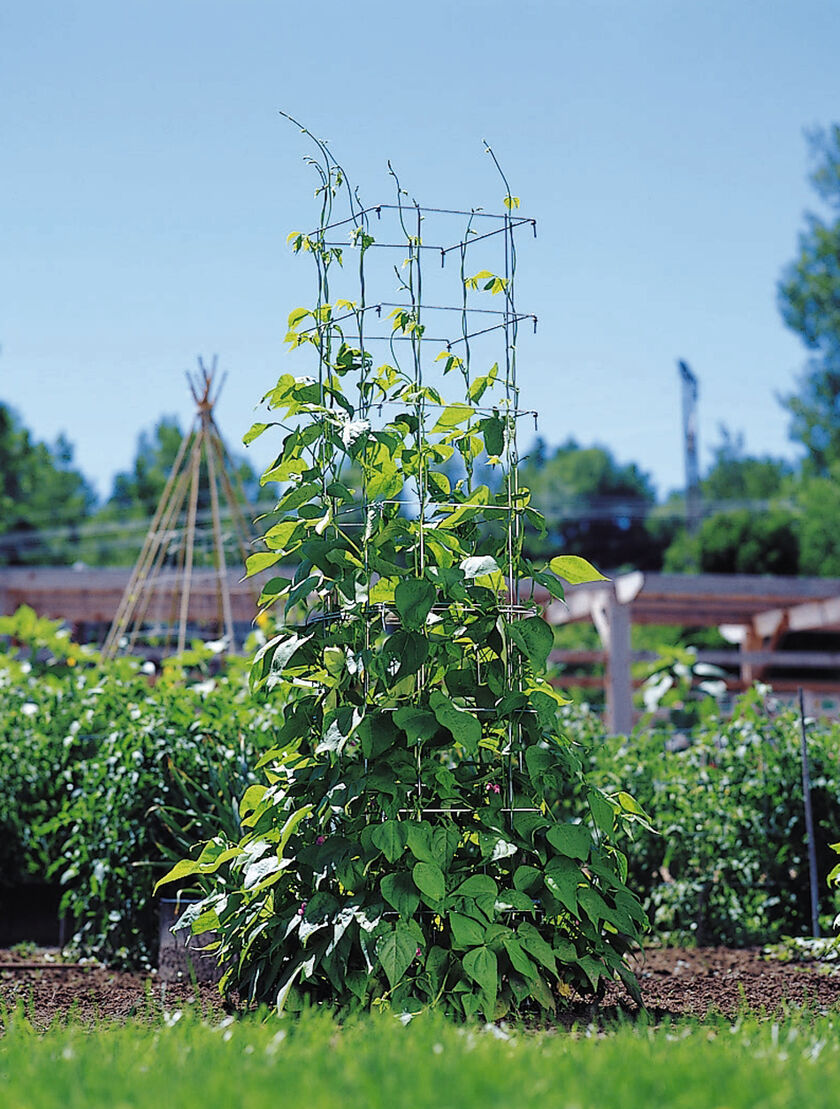
Teepee Trellises
The picture above shows pole beans climbing a teepee of stakes, which is an easy and affordable structure to build on top of your garden bed (the fencing wire on the left will make a good trellis also, but probably for a shorter plant than beans). To make a teepee, simply take three or four stakes (in this picture, thin PVC pipe is used) and space them a foot or so apart around an imaginary square, triangle, or circle in the ground. Pointing the top of each stake toward the center of the square/triangle/circle, pound them into the ground so as to anchor them sufficiently.
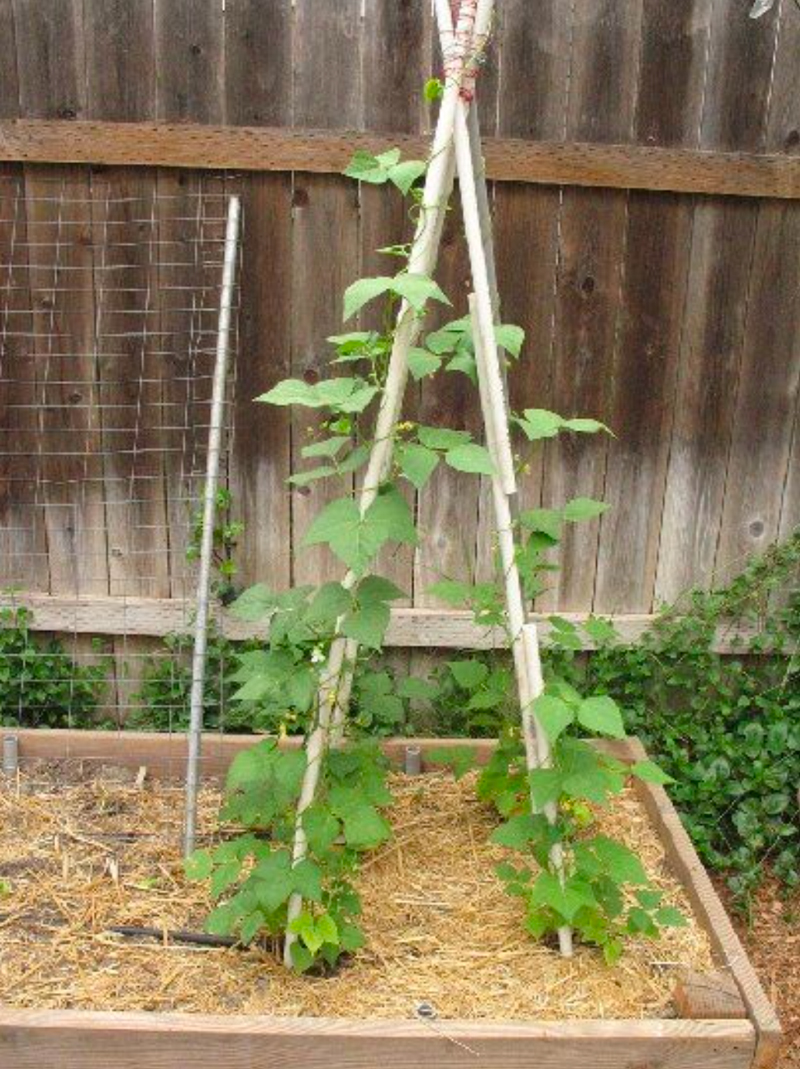
Then gather together the top ends, binding them with twine, rope, or wire. Plant two or three beans around the base of each pole. As plants grow and start to send out tendrils, train these around the poles and they will vine upward. You may be tempted to place four or more plants beneath each pole, but while there is enough ground space for this, the vines will crowd each other out on the poles. Believe it or not, should get more production out of fewer plants.
Longhouse Teepee Trellises
The photo above shows a longer version of the teepee, which covers two garden rows with a trellis for climbing beans. Sticking with the Native American building theme, this one might be called a longhouse. Basically, two rows of poles are used on parallel garden rows, angled inwards towards the other row. Space poles 6-12 inches apart in the rows (with one bean plant per stake) and space rows at least 36 inches apart.
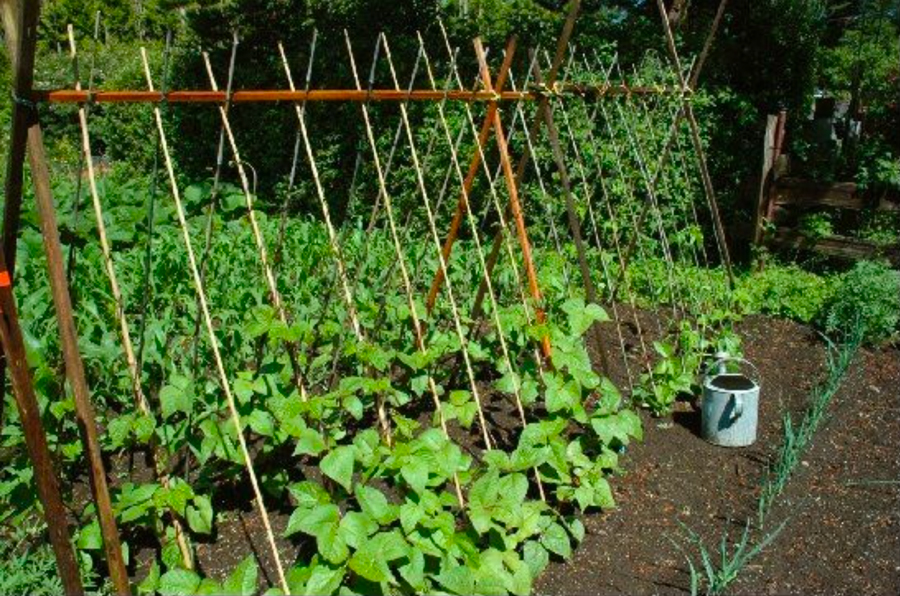
In the center above both rows, on top of the “X” intersection where the stakes meet, another stake is placed horizontally to serve as a crossbar. If your rows are longer than your horizontal stake, then simply add an additional horizontal stake each time you need to extend the crossbar. Using some wire, twine, or rope, bind these stakes together at the joints where the row stakes meet with the crossbar.
For particularly long trellises, you also may want to place some heftier stakes at regular intervals. Or anchor each end of the trellis with a post, such as a metal “T” fence post or steel rebar, lashing this to the nearby stakes. The structure will need to stand up to a very heavy load once plants cover it and begin to bear. You can grow an almost infinite quantity of beans using these teepee longhouse trellises.
Rope Ladder
This picture shows a “rope ladder” trellis. Basically, you start with a strong frame, which can be built from any available material, such as wood, metal, or PVC pipe. The frame will consist of two vertical posts (one placed at each end of the row), plus two horizontal support bars set between these posts.
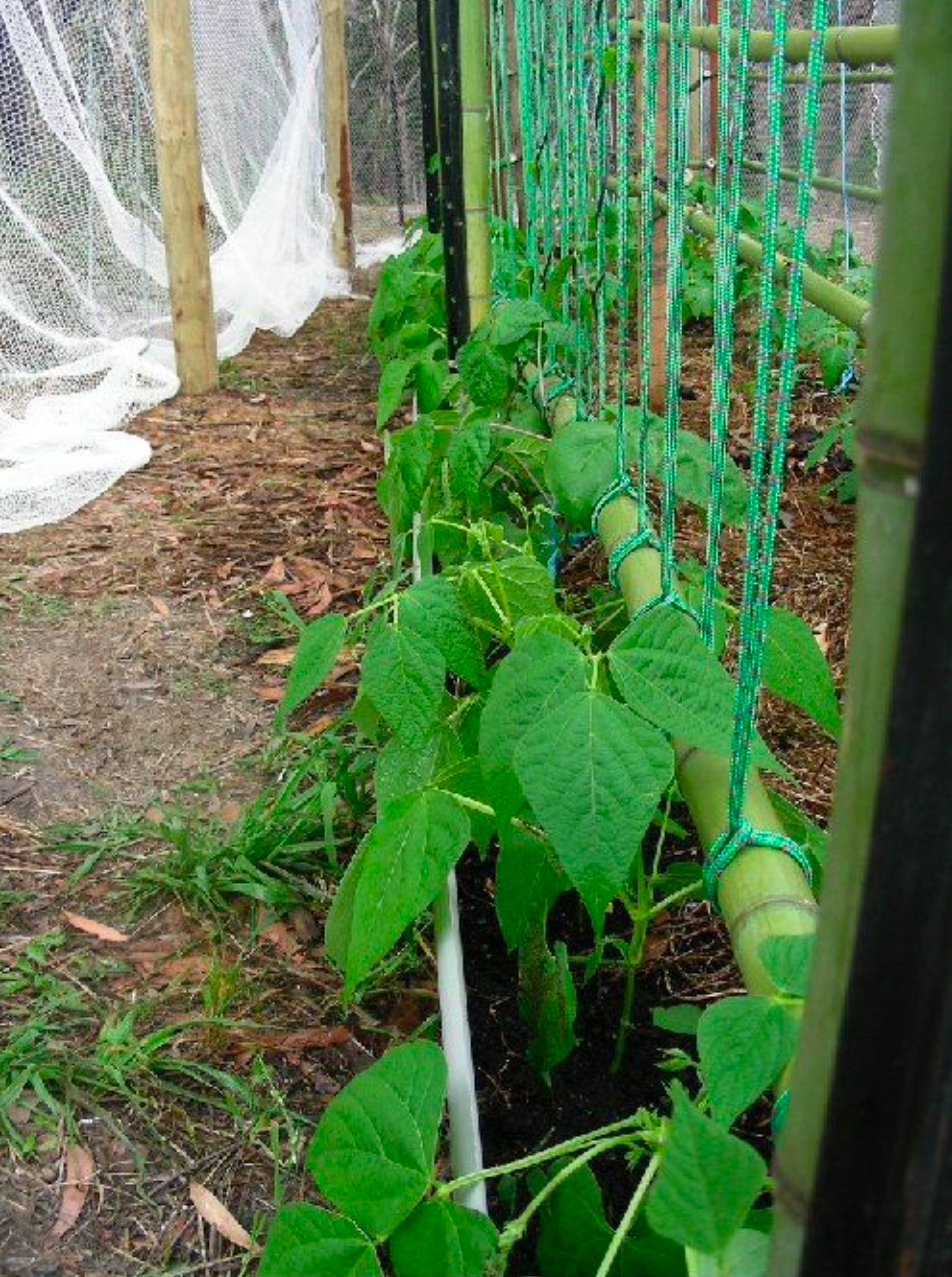
The low bar can be 3-6 inches or so off the ground, while the high bar should be 5-7 feet off the ground.Then take some twine, rope, or flexible 20-gauge wire, and string it up and down between these bars. While you could drill some fancy holes in the bars, the easier method is simply to wind the twine/rope/wire up and down around the outside of these bars. Aim for a separation of 6-12 inches between each winding, and double wrap the twine/rope/wire around the bar each time to hold it in place.
Fences and Walls
A variation on the rope ladder is to use fencing wire or strong plastic netting between the frame, which provides the vining plants with even more structure to climb upon. Chain link fences or lattice fences make good trellises, too. Of course, you can add horizontal supports to the rope ladder as well. Once you are finished stringing the vertical wire/rope/twine supports for the rope ladder trellis, wind some horizontally around the end poles so that the plants have a horizontal support every 6-12 inches.
Generally speaking, a wall or solid fence will not work well for climbing beans, since there is nothing for the plants to wind around and hold onto. However, walls (particularly south-facing walls) can reflect a lot of heat and warmth, making them a perfect location to grow heat-loving bean plants. This works especially well in cool, short-season climates where every added degree of warmth results in faster growth. Any of the vertical support structures discussed here can be placed right near a wall to provide a great growing environment for bean plants.
3D Fences and Rope Ladders
Another idea is to lean together two vertical structures in an A-frame pattern. Basically, this is the same shape as the Long House Teepee structure mentioned earlier, which can support two garden rows’ worth of bean plants. Here, you can learn together two panels of chain link fence, lattice fence, or frames that are strung with plastic netting or rope ladders. Make sure you provide enough support for them, possibly through additional poles or stakes, and tie everything together wherever it intersects using twine, wire, or rope.
Vegetable Cages and Bean Towers
Many nurseries sell tomato cages, which also can work as bean trellises. However, some of these are built for determinate tomatoes and top out at 36-48 inches, which is not tall enough to support climbing beans. Look for something a bit taller; a cage in the 5-7 foot range is better. A few online sellers offer bean towers, but they are harder to find in local nurseries. Here is a very nice selection of bean towers and trellises; these provide a very productive way to grow beans.
Soil Secrets, Fertilization, Watering, and Care
Beans are quite adaptable. Many kinds can grow in poor soil. But plants will grow stronger and produce more beans when grown in rich, loose soil.
If your garden soil contains a lot of clay or sand, you can amend it by digging in some organic matter, such as compost, manure, leaves, lawn or hedge clippings, or straw. Mixing this into the top 6-12 inches of soil will ensure good soil structure with enough air pockets for even watering and root aeration. Putting plenty of organic matter in the soil also enables healthy water retention. As a bonus, it feeds earthworms and beneficial microorganisms that can nourish the plants’ roots and improve its disease resistance. If you can afford it, get a bag or two of good compost or composted manure (use chicken or poultry manure only in smaller amounts, because it’s concentrated) and work this into the soil before planting. Your plants will thank you.
Fertilizer
As far as fertilizer, beans need less than most plants. This is because they are in the legume family, and these plants have the rare ability to add nitrogen to the soil. The roots of legumes form a symbiotic relationship with friendly nitrogen- fixing bacteria in the soil. These bacteria take the nitrogen from the air and turn it into a form that plants can use. Beans grown in good soil have their own little plant-food factories beneath the soil. If you’ve ever pulled up a whole bean plant and seen the little white beads attached to its roots, these are the colonies of
friendly nitrogen-fixing bacteria. Leave them in the soil and they will remain to nourish other plants.
Legumes such as beans not only make their own nitrogen fertilizer, but leave the soil more fertile than they found it. This is why many farmers employ a crop rotation system using legumes such as beans, peas, favas, clover, or vetch. Generally, these crop rotation systems follow the legume crop with a planting of heavy-feeding, nitrogen-hungry plants such as broccoli, spinach, or other green vegetables. While crop rotations require extra planning and care, they can create a significant cost savings by reducing the need for extra nitrogen fertilizer.
Your beans will not need much nitrogen fertilizer. Pole beans will benefit from a small quantity to fuel their leafy growth, while bush beans do not need any extra nitrogen. However, beans need adequate amounts of other nutrition, including phosphorus (phosphate) and potassium (potash). These may be present in your soil already, particularly if you have amended it with good compost or manure. If not, add a small amount of organic fertilizer to the garden soil by scratching it into the top inch or two of soil near (but not touching) your beans.
Most local nurseries and garden centers sell one or more brands of organic fertilizer. Large nationally-distributed brand names of organic fertilizers include Espoma, Dr. Earth, and Down To Earth, though your local store may carry a regional brand from your area. Any all-purpose garden or vegetable fertilizer (e.g. “Organic Vegetable Food”) will do just fine, including any product that features tomatoes in its name or picture (e.g. “Tomato Garden Fertilizer”).
Fertilizers have a set of three numbers printed on their bags, boxes, or labels. The numbers refer to the relative quantities of the three major plant nutrients: nitrogen (N), phosphate (phosphorus) (P), and potash (potassium) (K). A balanced fertilizer, such as one labeled with an N-P-K number of “5-5-5”, is adequate for beans, or you could use a “bulb” or “bloom” fertilizer with less nitrogen and more phosphate and potash (e.g. 3-6-6). I would use a little less than the amount of fertilizer recommended in the directions on your box or bag. Once you apply this to the soil, water it in well.
Inoculant
Some nurseries also sell inoculant for legume seeds. The inoculant looks like a little bit of black powder, and by dusting your bean seeds with it before planting them in the ground, you can improve their germination rates and health. This powder contains the nitrogen-fixing bacteria that enable your plants to generate
this plant food. If you use inoculant, you will not need as much regular fertilizer. It is an especially good idea to use inoculant the first time you grow beans, after which the good bacteria will be present in your soil for a few years. If your local nursery does not carry inoculant for legume crops, you can find it here.
Watering
Watering your bean plants is very important. They drink plenty of water as the vines grow upward and will need even more as the bean pods begin to form. Deep waterings are better than shallow ones, because they encourage a stronger root system, which makes the plant sturdier and more productive. The proper amount of water will differ based on your climate, temperature, and humidity.
If you’re not sure when to water, stick your finger a knuckle or two deep into the garden soil near the plants. It may not be wet on top of the ground, but if you feel dampness an inch or two down, then you can wait to water. If it is dry, then give the ground under the plants a long, slow soaking, which allows the water to penetrate those first few inches and reach the deeper root systems.
To discourage leaf diseases, water the soil only and try to keep the plant’s foliage dry. A drip irrigation system or a soaker hose can help keep the water at soil level. Another good practice, even if you water with a sprinkler or spray nozzled hose, is to water your plants in the morning so they have enough time to dry out by nighttime.
Watering plants in the morning is good for another reason, too: it leaves enough time for plants to warm up before nightfall. Beans are heat lovers and they will grow faster when they’re warm. In all but the hottest climates, you want them to be as warm as possible when nighttime comes. It is a little known fact that most plants do the majority of their growing at night. If you cool them off with an evening watering, you will discourage a great deal of growth, whereas plants will have had plenty of time to warm up from a morning watering. In most climates, beans will grow a lot faster this way.
Beans need very little care. Once you have planted them, just keep them well watered. Or pole beans, make sure to train the young plants so that they climb their vertical supports. Simply wait until the plants start to send out their vining tendrils, and then help them wrap around the vertical supports; they will find their way up from there. Bush beans do not need any help climbing, since they are shorter and self supporting. Also, if pole beans’ growth stalls out midway through the summer, apply a little more fertilizer to the soil around the plants and water it in with a deep soak. This should revive any plants that start to fade.
Mulching
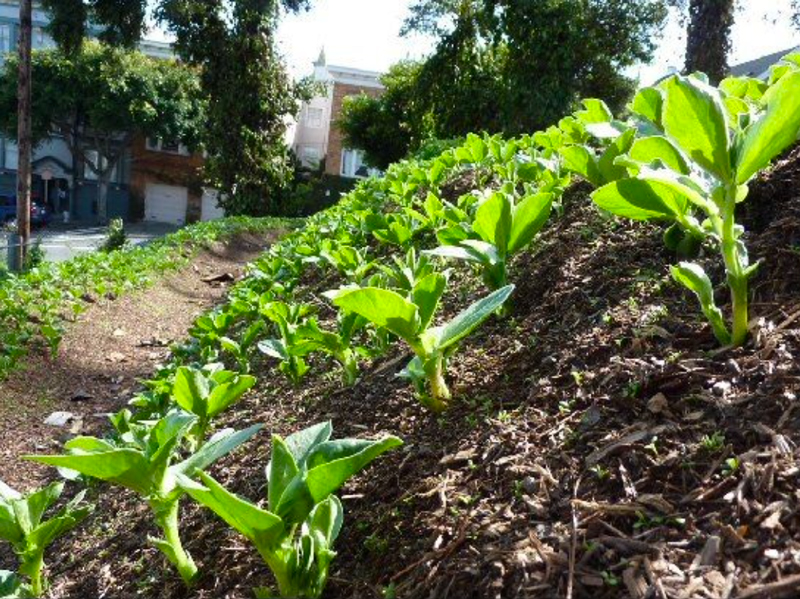
Mulching is one more step you can take to ensure the success of your bean plants. Both pole and bush beans benefit from mulching. This is the practice of covering the soil around their roots with a blanket of extra material, such as compost, leaves, grass or hedge trimmings, wood chips, newspaper, or shredded cardboard. Once bean plants are up and growing, cover the ground around them with a mulch blanket about 2-4 inches thick. Do not cover the plant itself; leave a little hole in the mulch where it grows.
Mulch insulates the plants’ roots, protecting them from heat waves, cold snaps, and extreme temperature fluctuations. Mulch also absorbs water, preventing most runoff and evaporation. Mulching your plants can reduce water use considerably as well, keeping the ground moist beneath the mulch blanket. Your bean plants will be happier and bear more beans when mulched! The picture below shows young Fava Bean plants emerging from a well-mulched bed on a hillside.
Combating Diseases and Pests
Plant diseases and pests rarely knock out a crop of beans and peas, although they can reduce your productivity. They will be worse in moist climates. Keeping the foliage of your plants dry by watering into the ground (and not spraying the plant) will help reduce or eliminate leaf diseases. If you notice some mystery spots on your plants’ leaves, take a look at this page from LSU Ag Center and see if it helps you to self-diagnose your issues. Link: http://www.lsuagcenter.com/en/our_offices/departments/Plant_Pathology_Crop_Physiology
Spraying the foliage with some diluted kelp extract (available at nurseries) sometimes stops diseases, perhaps by improving plant vigor. If all else fails, check nurseries and online retailers for an organic spray called Serenade TM. It really works to eradicate or reduce a wide range of leaf ailments, including various strains of mildew.
As far as pests go, these vary by region. On bean and peas plants, it is relatively simple to check leaves for infestations. You can pick off larger bugs or spray them off with water (I release my chickens to clean up an area before planting, but make sure they don’t dig up the vegetables). Aphids can be controlled with an organic soap spray or by releasing ladybugs, lacewings, or parasitic wasps (see if your nursery has these or order some online).
If you notice suspicious holes in leaves, check the undersides of leaves for worms; keep an eye on your plants, because even one worm can do a lot of damage if left unchecked for a few days. If birds eat your seedlings (which often happens with peas), cover your plantings with some plastic bird netting, which you can buy at a hardware store or nursery. Use some short stakes or cinderblocks to raise the level of the netting above the young plants, and then remove netting after two weeks or so.